.CRT and .Key Files Used for?
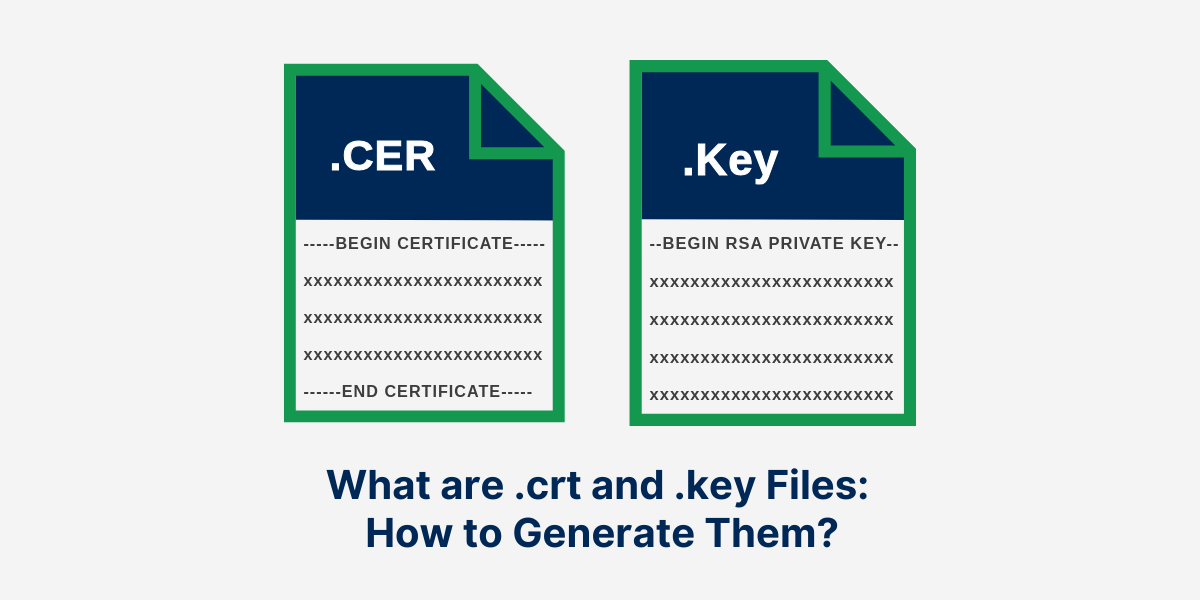
.crt and .key files are used for SSL certificates and enable secure connections between a web server and web browsers. A .crt file contains your SSL certificate, while a .key file contains the private key for the certificate. Together, the .crt and .key files allow your web server to establish an encrypted SSL connection and enable browsers to verify that your website is trusted and secure.
Generating and installing .crt and .key files is an important part of setting up SSL on your website. This guide will explain what .crt and .key files are, why they are needed for SSL, how to generate them, and how to install them on your web server.
What is .crt File in SSL/TLS?
A .crt file is a digital certificate file format used in SSL/TLS security protocols. These .crt files contain essential information that verifies the authenticity of websites and secures online communications. The file includes details like the website’s public key, domain name, organization information, and the certificate’s validity period.
Web browsers use .crt files to establish encrypted connections between users and websites, protecting sensitive data from unauthorized access. System administrators install these certificate files on web servers to enable HTTPS connections.
The .crt format is widely supported across different operating systems and web servers. This standardized format helps maintain consistent security practices across the internet, making it a fundamental component of web security infrastructure.
What is .key file in SSL/TLS
A .key file contains the private key component in SSL/TLS security systems. These .key files are critical security elements that must remain confidential and secure on the web server. The private key file works with the public certificate to create secure encrypted connections between servers and clients.
Web servers use .key files to decrypt incoming data that was encrypted with the corresponding public key. The file typically uses RSA encryption or ECC encryption algorithms to generate unique cryptographic signatures. System administrators must protect .key files with strict permissions and access controls.
The security of an entire SSL/TLS implementation depends on keeping this private key safe and inaccessible to unauthorized users.
Why are .crt and .key files needed?
The .crt and .key files serve distinct purposes in establishing an SSL connection:
The .crt file:
- Contains your SSL certificate provided by the Certificate Authority.
- It includes your public key, which is used to encrypt the traffic and establish secure connections.
- Allows browsers to verify that your website is trusted and certified by the CA.
- Enables browsers to display the Tune icon and green bar indicating a secure connection.
The .key file:
- Contains the private key paired with the SSL certificate.
- It is unique and secretly generated on your server.
- Enables your web server to decrypt traffic that was encrypted with your certificate’s public key.
- Allows the encrypted traffic to be decrypted and read by your web server.
Without installing the properly matched .crt and .key files on your web server, the encrypted SSL connection cannot be established. The .crt file contains the public key to encrypt traffic, while the .key file contains the private key to decrypt it.
How to Generate .crt and .key Files
To get the .crt and .key files for your website’s SSL certificate, you need to go through the certificate issuance process with a CA.
Here are the general steps:
- Generate a Private Key
- Generate a CSR (Certificate Signing Request)
- Purchase and Submit the CSR to a Certificate Authority
- Install the Signed Certificate (.crt)
- Install the Private Key (.key)
1. Generate a Private Key
The first step is to generate a private key on your web server. This will be used in your certificate signing request (CSR) to the CA. To generate a private key:
- Use openssl commands or another command line tool on your server to generate a new 4096-bit RSA private key. For example:
openssl genrsa -out yourdomain.key 4096
- Set a strong passphrase on the key for extra security.
- The output will be your private key file (yourdomain.key).
2. Generate a CSR (Certificate Signing Request)
A CSR is an encoded file that contains your details and public key. It is submitted to the CA for signing your certificate. To generate a CSR:
- Use the openssl req command, inputting your details when prompted. For example:
openssl req -new -key yourdomain.key -out yourdomain.csr
- This uses your private key to create a CSR file (yourdomain.csr).
3. Purchase and Submit the CSR to a Certificate Authority
- Purchase the type of SSL certificate you need from a trusted CA like DigiCert, Comodo, GlobalSign, etc.
- Submit your CSR to the CA for signing.
- The CA will verify your details and sign the certificate.
4. Install the Signed Certificate (.crt)
Once issued, the CA will provide you with the signed SSL certificate in .crt file format. Installing it on your web server completes the process.
- Copy the .crt file to your web server. On Apache or Nginx, it is usually installed at /etc/ssl.
- For IIS on Windows, install it via the server’s certificate management console.
- Complete the SSL certificate installation per your server software’s documentation.
5. Install the Private Key (.key)
For SSL to work, you need to install the private key generated earlier along with the .crt file.
- Copy the .key file to the SSL certificate installation folder on your server, usually /etc/ssl.
- Restrict permissions on the .key file since it enables decryption of all your SSL traffic.
Your SSL certificate is now active and ready to enable HTTPS and other secure connections. To complete the SSL certificate installation, you must place both the .crt and .key files in the correct locations.
How to Convert Other Certificate Formats to .crt/.key
Certificate Authorities sometimes provide the SSL certificate and private key bundled in formats like .pem or .pfx rather than separate .crt and .key files. If needed, you can convert these formats to generate the required .crt and .key files:
Converting from .pem to .crt and .key
A .pem file contains the certificate and key combined in either a single file or a bundle.
To extract them into separate files:
openssl rsa -in yourdomain.pem -out yourdomain.key
openssl x509 -in yourdomain.pem -out yourdomain.crt
This will extract the private key and certificate from the .pem file.
Converting from .pfx/.p12 to .crt and .key
A .pfx file (or .p12 file) also bundles the certificate and key in a single encrypted file. To convert it:
openssl pkcs12 -in yourcert.pfx -out yourdomain.pem
This unbundles the .pfx file into a .pem file. Then follow the .pem to .crt/.key instructions above. You’ll need to enter the passphrase for decrypting the .pfx file when prompted.
Once you have extracted the .crt and .key files, you can install them on your web server as per the usual SSL certificate installation process.
How to Install .crt and .key Files on your Web Server
Once you have your .crt and .key files ready, the final step is installing them properly on your web server. The exact steps depend on which server software you use:
Installation on Apache
- Place your .crt and .key files in the /etc/ssl directory. For example:
- /etc/ssl/yourdomain.crt
- /etc/ssl/yourdomain.key
- Edit the Apache config file at /etc/apache2/sites-available/default-ssl.conf and update the SSLCertificateFile and SSLCertificateKeyFile directives to point to your .crt and .key files. For example:
SSLCertificateFile /etc/ssl/yourdomain.crt
SSLCertificateKeyFile /etc/ssl/yourdomain.key
- Restart Apache to load the new certificate – sudo systemctl restart apache2
Installation on Nginx
- Place your .crt and .key files in the /etc/nginx/ssl directory. For example:
- /etc/nginx/ssl/yourdomain.crt
- /etc/nginx/ssl/yourdomain.key
- Edit the Nginx config file at /etc/nginx/sites-available/default and update the ssl_certificate and ssl_certificate_key directives:
ssl_certificate /etc/nginx/ssl/yourdomain.crt;
ssl_certificate_key /etc/nginx/ssl/yourdomain.key;
- Restart Nginx – sudo systemctl restart nginx
Installation on IIS (Windows)
- Open IIS Manager and go to Server Certificates on your server.
- Click Import under Actions and import your .crt file.
- Open the SSL certificate’s properties and set your imported .key file under Private Key.
- In Sites > Bindings, add a new HTTPS binding and select the imported certificate.
This will install the .crt and .key files and enable the SSL certificate for your IIS websites.
Final Thoughts
Installing properly generated and matched .crt and .key files is vital for enabling SSL on your web server. The .crt file contains the public certificate provided by the CA, while the .key file holds the generated private key. Browsers verify the .crt while your server uses the .key to decrypt encrypted traffic.
To implement SSL, you need to generate a private key and CSR, purchase an SSL certificate from a trusted CA, and install the issued .crt file along with its paired .key file on your web server software like Apache, Nginx, or IIS. With the correct .crt and .key files installed in the right folders, your server can establish secure HTTPS connections with browsers and users.
Frequently Asked Questions (FAQs) About .crt and .key Files
Should the .crt and .key have the same filename?
It is recommended that the filenames of the certificate (.crt) and private key (.key) be similar, usually only differing in the file extension. Having similarly named .crt and .key pairs avoids confusion and ensures the files are easily associated. However, matching filenames is optional for them to function together.
What is the best way to protect my .key file?
Since the .key file enables decryption of your SSL traffic, it is highly sensitive and needs to be protected. Some ways to improve .key file security include setting restrictive filesystem permissions (600 suggested), encrypting it with a passphrase, and limiting physical access to the server storing it. You can also store keys in Hardware Security Modules (HSMs) for maximum protection.
How do .crt and .key files work together?
The .crt file provides the public key, while the .key file contains the private key. Together, they allow secure data transmission over the internet by enabling SSL/TLS protocols.
What is the difference between a .crt file and a .cer file?
A .crt file contains a PEM-encoded SSL certificate. A .cer file also includes a PEM-encoded certificate. The .crt and .cer file extensions can be used interchangeably – they are technically the same format. Either a .crt or .cer file can be installed as an SSL certificate on web servers like Apache and Nginx.
How can I create a .crt and .key file?
You can create these files using tools like OpenSSL. You typically generate a private key first (.key), then create a certificate signing request (CSR) to obtain a .crt file from a Certificate Authority (CA).
What happens if I lose my .key file?
If you lose your .key file, you cannot establish secure connections for services using that key. You will need to create a new key and obtain a new certificate (.crt) from a CA.
Can .crt and .key files be used on different servers?
It’s not recommended to use a .crt and .key file pair on different servers. Each key pair is specific to the server for which it was generated and using them elsewhere can lead to security vulnerabilities.
How do I install .crt and .key files?
Installation varies by server type, but generally, you will need to place the .crt and .key files in the specified directories and configure your web server (like Apache or Nginx) to use them for SSL/TLS certificate.

Priya Mervana
 Verified Web Security Experts
Priya Mervana is working at SSLInsights.com as a web security expert with over 10 years of experience writing about encryption, SSL certificates, and online privacy. She aims to make complex security topics easily understandable for everyday internet users.


